Showing posts with label Unit 31 Editing. Show all posts

Monday, 9 May 2016

Music Video Editing


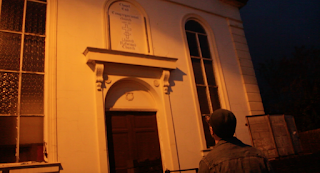
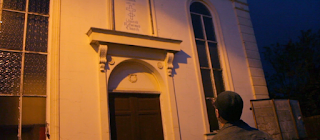
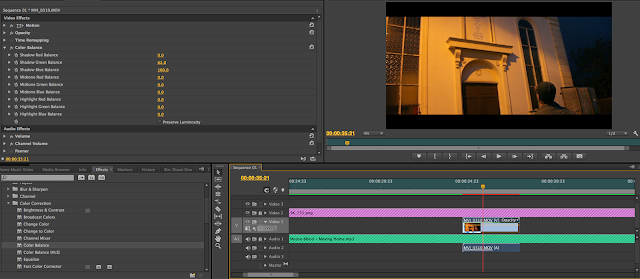
This particular clip I shot had a very orange hue to it due to the fact that I used a streetlight as my main light source, so I decided that it would be beneficial if I attempted to adjust the colour balance in post production. I experimented with the different red, green, blue colour balances for the shadows, midtones and highlights and eventually ended up with a clip that I was happier with. 

 
                               Before                                                                         After

Wednesday, 3 February 2016

Storyboard and Shot List

Below is a rough storyboard that Beth and I have made in order to give us an idea of the kind of shot types, camera angles and camera movements that we would like to utilise in our own promotional videos. 


Below is a list of the shots that we plan to get for our promotional video.


  • Establishing Shot (with logo)
  • Close Ups of Iconography, people etc


Monday, 18 January 2016

Psychoanalysis Film - Editing Process

The editing and post-production stage is vital in the creation of my psychoanalytical film; the way in which I edit my clips and combine them has a huge impact on the way the my subject's obsession is portrayed. For example, shallow depth of field, repetitive clips and lingering shots all echo and highlight the idea of obsession. 
To edit, I use Adobe Premiere Pro CS6, which allows me to organise my footage and separate clips according to the content of them. I have separated and organised each of my clips into 'bins' - one for audio, one for titles, one for interview footage, one for footage of the car and one for miscellaneous footage.


Monday, 19 October 2015

Editing Analysis - Vivre Sa Vie


Find a short scene from your new wave film, question why the editor chose to cut when they did. Annotate your video and put it on your blog.


Monday, 12 October 2015

Editing Video (About You)


For this video, I was given a piece of music and had to put together a music video made from stock footage and clips I found myself, focusing particularly on cutting and editing in time with the music.


Overall, I think that the outcome was successful, although if I had been given more time I would've liked to have finished a video for the entire length of the song. This task showed me that editing is very time-consuming and therefore in future projects I will aim to manage my time more effective. It also enabled me to develop my editing skills when using Adobe Premiere Pro for future projects. I learnt how to layer videos on top of each other and change the opacity, as well as learning how to change the speed/duration of clips. 

Monday, 5 October 2015

Development of Editing Technology


The Development of Editing Technology


The purpose of editing a film is to piece together a sequence of clips to create a film that makes sense and also has an impact on the viewers emotions. The idea of editing is to determine in what order the information is to be received, how the audience is meant to feel about the events and the characters, the pace of the narrative etc.


To begin with, all editing was done in-camera. Each clip was shot in chronological order, therefore one reel of film was played at a time. One of the earliest known edited films was 'The Great Train Robbery' which was written and produced by Edwin S Porter. The film was only 12 minutes in length but includes a wide variety of editing techniques such as jump cuts and cross-cutting. 


The Moviola

The earliest forms of editing were very basic. Laboratory processing of the exposed film negatives was required and then if a film editor wanted to cut a scene, they would have to cut the reel of film over a well of light. This method had to be repeated several times and was very time-consuming. However, in 1924, the moviola was introduce by a man named Iwan Serruier. It was a device that allowed a film editor to view a film whilst editing it simultaneously. 

Film editors could study individual shots in the cutting room so that they could pin-point an appropriate point to cut. The moviola was a vertically-orientated machine where the work prints and magnetic sound tapes were run in a similar way to the thread in a sewing machine. At one point in the process, each frame on the print would pass through a lens and the image would get viewed on the machine's viewing screen. A special chalk-like pen could then be used on each frame to mark on what the editor intended to do - whether he wanted to cut or splice the frame.

The Moviola was adopted by many huge names in the film industry, such as Universal Studios, Warner Brothers and Charles Chaplain Studios. Even today, famous director Stephen Spielberg instructed that the film editor he employed for his film Munich, Michael Kahn, use the moviola machine to edit. 


Modern Editing


References:


  • Timrohamro.com,. "Moviola: The First Movie Editing Machine". N.p., 2016. Web. 6 Jan. 2016.
  •  Itchyfish.com,. "Old School Film Editing Machines: Moviola And Steenbeck - Itchy Fish". N.p., 2010. Web. 6 Jan. 2016. 


References:

1 - http://www.filmreference.com/encyclopedia/Criticism-Ideology/Editing-THE-DEVELOPMENT-OF-EDITING.html
2-http://www.infoplease.com/cig/movies-flicks-film/fade-brief-history-editing.html

The Conversation - 4 Hour Film Challenge

The conversation from Frankie Smith on Vimeo.

This is a response to a brief given to us to complete a short film within 4 hours. I worked as part of a 5 person team, primarily working with the camera. Overall, I think that the video was successful and I'm very pleased with it as we managed to complete the entire video along with the editing in just over four hours. We allocated jobs out to each member of the group and everyone cooperated with each other easily and we also incorporated numerous shot types and camera movements. We effectively used various pieces of equipment, such as a tripod, two cameras and several lenses (18-55mm and 60mm). 


Shot using the 60mm lens on a Canon EOS 600D


Shot Types and Camera Angles

 Close Up
 Long Shot
 Mid-Shot
 Two-Shot, 180 degree rule
 Dutch Angle, Long Shot
Establishing Shot


Despite the fact that I think that the video was successful, I am aware of the improvements that could be made. 
For example, at around 2:08, the shot is very over exposed. This is because the aperture needed to be lower, as did the ISO (too much light was being allowed through the lens).


In the first scene, the ISO is extremely high (ISO 6400 I believe) and this resulted in a very grainy video. To resolve this issue in future I would use a higher f-stop.


Wednesday, 30 September 2015

Editing Techniques Tutorial


Above is a brief tutorial on basic continuity editing techniques used in filmmaking. In the tutorial I explain what each technique is, show cinematic example of the technique and my own examples. 

I believe that overall, the tutorial was successful in the sense that it explains each editing technique and gives a good example of each one in practice. However, there are a few things that I would've done differently if given the chance to shoot again. For example, I would in future use a voice-over rather than explaining the techniques using text as audiences prefer to listen than to read (it being less time consuming to listen to some one talking). 

Tuesday, 22 September 2015

Continuity Editing

Continuity Editing


Shot Reverse Shot

This is where one character is seen looking off another character, who is often off-screen at this point, and then this character is seen looking back at the first character. The audience can then assume that the characters are looking at one another, as the characters are facing opposite directions as if they were sat in front of each other.

180 Degree Rule

This is an essential rule to shooting/editing film and media, it keeps the camera on the side of the action. The rule states that the camera(s) should remain the same side of an imaginary line (which is perpendicular to the cameras viewpoint in the establishing shot) at all times. The rule should not be broken so as to not confuse the audience watching.

30 Degree Rule

This rule is used in filmmaking in order to create continuity between different shots within a large sequence of shots. Between each shot, the camera should be moved to a minimum of 25 -30 degrees to avoid jarring transitions or jump cuts. 

Cross Cutting

Cross cutting is the process of cutting between different sets/scenes of action that can be occurring simultaneously, or even at different times. This editing techniques is often used to create suspense or tension or to show the relationship between the different scenes. 

Match on Action

This is where the editor cuts from one shot to another which matches the action in the first shot. It gives the impression of continuous time, although the two shots may have been filmed hours apart. 

Temporal Overlap

This is when an action or shot is repeated from a different angle to put emphasis on the content of the shot. This is a common technique used in action films, as it can be used to show fast paced action from different perspectives so that the audience can fully understand what is occurring in the scene. 


Continuity Editing Techniques from Frankie Smith on Vimeo.
Monday, 21 September 2015

Camera Movements and Shot Types Tutorial


In this tutorial,I explain and give both cinematic examples and my own examples of different shot types and camera movements commonly used in film.


Overall, I think that my videos were successful, however, I did have to reshoot several of the clips due to them being over-exposed or slightly out of focus. To fix this problem, I changed my ISO, aperture and shutter speed to make the videos correctly exposed. 


I had to reshoot this close up, as it was over exposed.  
I lowered my ISO to ISO 100 so that less light was able to enter the lens.

Other problems I faced were: when panning, the tripod I used was just a standard photography tripod so when following my subject, it was not smooth. To solve this issue, I used a fluid head tripod.