Wednesday, 30 September 2015

Editing Techniques Tutorial


Above is a brief tutorial on basic continuity editing techniques used in filmmaking. In the tutorial I explain what each technique is, show cinematic example of the technique and my own examples. 

I believe that overall, the tutorial was successful in the sense that it explains each editing technique and gives a good example of each one in practice. However, there are a few things that I would've done differently if given the chance to shoot again. For example, I would in future use a voice-over rather than explaining the techniques using text as audiences prefer to listen than to read (it being less time consuming to listen to some one talking). 

Tuesday, 29 September 2015

The Auter Theory


http://dlibrary.acu.edu.au/staffhome/siryan/screen/auteur%20theory.htm

Thursday, 24 September 2015

French New Wave Research


Films


  • Breathless (1960)
  • The 400 Blows (1959)
  • Jules and Jim (1962)
  • Vivre Sa Vie (1962)
http://www.newwavefilm.com/new-wave-cinema-guide/nouvelle-vague-where-to-start.shtml


https://www.criterion.com/explore/4-french-new-wave


 http://theculturetrip.com/europe/france/articles/the-french-new-wave-revolutionising-cinema/


Useful Websites/Webpages

http://theculturetrip.com/europe/france/articles/the-french-new-wave-revolutionising-cinema/

http://www.bfi.org.uk/news-opinion/news-bfi/lists/10-great-french-new-wave-films

http://www.newwavefilm.com/new-wave-cinema-guide/nouvelle-vague-where-to-start.shtml

https://www.criterion.com/explore/4-french-new-wave

http://www.theblackandblue.com/2010/03/29/the-french-new-wave-a-cinematic-revolution/


Wednesday, 23 September 2015

ISO Experiments at Night

Below are some examples of experiments I have carried out during the night, looking specifically at the ways in which changing the ISO has an effect on the overall video.


This is an example of the footage I shot on a Canon DSLR (EOS 700D) at night/low light. I shot this footage at the side of a road. I chose this location because I thought that the light from the headlights of passing cars would provide a good amount of light and movement to make an aesthetically pleasing video. My ISO was at 100 and  I used an aperture of f5.6 to allow plenty of light into the lens as well as create a relatively shallow depth of field. My shutter speed was at 1/50 because my frame rate was 24 fps (your shutter speed should be double the frame rate).


This was my first attempt at shooting with an ISO of 1600. 


Reflection

Process

I think that overall, my videos were relatively effective, particularly the ones that I used a tripod for. I worked with Beth (http://kechncbethanyheath.blogspot.co.uk) which helped a lot because it meant that we could help each other with any problems we faced. 

Strengths and Weaknesses/Problem Solving

I would say that my strengths would definitely be the fact that I used a tripod, worked effectively as part of a team and my knowledge of the camera settings.  
In regards to my weaknesses, I found it difficult to focus the camera on my subjects due to the low visibility at night.  To solve this problem we moved to a different location with a larger light source. 


Recommendations

If I were to shoot these videos again, I would be more ambitious with location and maybe experiment more with shots types, maybe use a panning shot or a tilt. 


Tuesday, 22 September 2015

Sound/Audio Testing

These short clips are experiments with various microphones, in order to establish which record the best quality audio when filming. 


In this video, we used only the in-camera audio to record Elliot talking. Although this does record sound, it is not very clear and there is a lot of extra noise picked up by the microphone. 


In this video, we recorded Elliot talking using a Zoom H1 microphone which we attached to the hot shoe ontop of the DSLR camera we were using. This was far more effective than the in-camera audio, however we can still hear a little bit of background noise.


Finally, we used a boom microphone which was plugged into a recorder, which was then plugged into the camera. This produced the best quality audio, however, using this method of recording sound is not always suitable as you need at least two people to operate it. 

Focusing The Camera

Below are a few examples of when I experimented with focusing. The aim of this was to be able to focus on one subject and then switch the focus to another subject smoothly.


Both of these videos are quite similar, although in the first my subject went slightly out of focus again at the end, which I hadn't intended to happen. I did a quick re-shoot of the same subjects and think that, although it took me considerably longer to focus on the second subject, it looks a lot smoother. The video was correctly exposed and because I shot indoors, I had to use a slightly higher ISO than I would in natural day light and a lower aperture. 


Process

I think that 

Continuity Editing

Continuity Editing


Shot Reverse Shot

This is where one character is seen looking off another character, who is often off-screen at this point, and then this character is seen looking back at the first character. The audience can then assume that the characters are looking at one another, as the characters are facing opposite directions as if they were sat in front of each other.

180 Degree Rule

This is an essential rule to shooting/editing film and media, it keeps the camera on the side of the action. The rule states that the camera(s) should remain the same side of an imaginary line (which is perpendicular to the cameras viewpoint in the establishing shot) at all times. The rule should not be broken so as to not confuse the audience watching.

30 Degree Rule

This rule is used in filmmaking in order to create continuity between different shots within a large sequence of shots. Between each shot, the camera should be moved to a minimum of 25 -30 degrees to avoid jarring transitions or jump cuts. 

Cross Cutting

Cross cutting is the process of cutting between different sets/scenes of action that can be occurring simultaneously, or even at different times. This editing techniques is often used to create suspense or tension or to show the relationship between the different scenes. 

Match on Action

This is where the editor cuts from one shot to another which matches the action in the first shot. It gives the impression of continuous time, although the two shots may have been filmed hours apart. 

Temporal Overlap

This is when an action or shot is repeated from a different angle to put emphasis on the content of the shot. This is a common technique used in action films, as it can be used to show fast paced action from different perspectives so that the audience can fully understand what is occurring in the scene. 


Continuity Editing Techniques from Frankie Smith on Vimeo.

Monday, 21 September 2015

Camera Movements and Shot Types Tutorial


In this tutorial,I explain and give both cinematic examples and my own examples of different shot types and camera movements commonly used in film.


Overall, I think that my videos were successful, however, I did have to reshoot several of the clips due to them being over-exposed or slightly out of focus. To fix this problem, I changed my ISO, aperture and shutter speed to make the videos correctly exposed. 


I had to reshoot this close up, as it was over exposed.  
I lowered my ISO to ISO 100 so that less light was able to enter the lens.

Other problems I faced were: when panning, the tripod I used was just a standard photography tripod so when following my subject, it was not smooth. To solve this issue, I used a fluid head tripod. 


Thursday, 17 September 2015

ISO Experiements

When planning a shoot, it is important to consider the type of lighting that is available as not only will it determine the overall exposure, but it will also have an influence on the camera settings that you will use. ISO dictates how sensitive the camera is to light, so the higher the ISO, the more light will be allowed into the sensor. It also allows for more grain or noise. 

In the series of videos below, I experimented with the way that adjusting the ISO setting on the camera affects the overall exposure of the video. I aimed to establish what visual differences occur when adjusting the ISO setting, and whether or not it has much of an effect at all.


I recorded this extreme close up of Beth using ISO 100, as I was in a bright outdoor environment. There is no grain visible and the subject is very clear to see. You can see all of the textures of Beth's face, eye and hair. 


I recorded this panning mid-shit of Beth in the photography studio using a single LED light source and an ISO of 16000. You can see that the video is more grainy than when I shot using ISO 100 and the details are less clear.

Wednesday, 16 September 2015

Aperture, Shutter Speed and ISO

The effects of Aperture, Shutter Speed and ISO


ISO

A camera's ISO is basically how sensitive it is to the light. The ISO setting is to give you an idea of how much light the sensor in the camera needs to register an image. 
Low ISO settings (such as ISO 100) allow you to use a higher aperture setting or longer exposure time in bright light.  Image quality is generally considered to be better when using a lower ISO, as less noise/grain is introduced into the image. Noise is basically random patterns of pixels/groups of pixels in which the colours are not based on light from the image. 


Aperture

Aperture is the lens opening and gives you control of depth of field. It controls the amount of light passing through the lens of the camera and is measured in f/stops. The maximum aperture is where the opening is at its widest, allowing the most amount of light in, such as f/2. Depth of field is important to consider when filming, as it controls what feature of the image is sharply focused, and what is blurred or out of focus. 


This is a good example of shallow 
depth of field. The daisy in the foreground
 is crisp and sharply in focus, whereas the daisies
 in the background are blurred and out of focus, 
we can only make out the basic shapes and colours 
of them.    


This is an example of a wide depth of field, 
where the foreground, mid ground and
background is in focus. 


Shutter Speed

Shutter speed is how fast the shutter of the camera closes when taking an image. It affects how sharp an image is when it is moving. A fast shutter speed freezes motion, whereas a slow shutter speed would create motion blur, where the path of movement from the object is visible. 


Book References

Digital Photography Handbook
Tom Ang
2005
Penguin


Photographs taken from google images

Monday, 14 September 2015

Induction Task


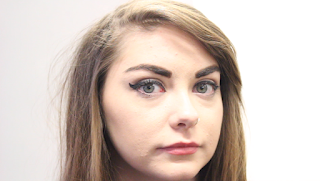
This video was inspired by Andy Warhol's 'Screen Tests'. I asked my subject to simply look at the camera. I shot this particular video in the studio, using only an LED light source to light the shot, meaning that a harsh shadow was cast behind the subject, making the shot look a lot more eerie and uncomfortable.


In this video, I was aiming to experiment with focus. I panned the camera towards my subject and as it reached her, the camera focussed on her more. Although I think that this was successful, I will in future use a tripod as the video in general is a bit shaky due to the fact the camera was handheld.


In this video I wanted to experiment with reflections and also with panning. I think this was relatively successful, although one of my subjects was not visible in the reflection shot.


How and Why Lighting Affects Camera Techniques for Moving Image


To give your videos a sense of time and place or to give the video a mood or feeling, you can use and experiment with different lighting techniques. This can help to communicate a story or narrative. For example, to create an eerie atmosphere, use low key lighting as this is most commonly used in horror films to create tension. On the other hand, using high key lighting can create a happy feeling or atmosphere. The cinematographer needs to be aware of the lighting they use to set a mood or portray a narrative.


Sometimes a cinematographer has to utilize the available lighting, which could be anything from the natural sunlight to street lights. There are various different types of lighting. Soft light - Diffused light that is not concentrated in one particular area, the product of a large light source such as the sky. In contrast, when we can see harsh shadows and high contrast between dark and light areas, it is apparent that the light is concentrated from one direction, the product of a small light source such as a spotlight.


Book References

Digital video handbook
Tom Ang
2005
Penguin

Photography
John Ingledew
2005
Lawrence King Publishing